BMCU Burning Tutorial(UART)
BMCU 370C V2.0
⚠️ This tutorial only applies to versions with a Type-C interface 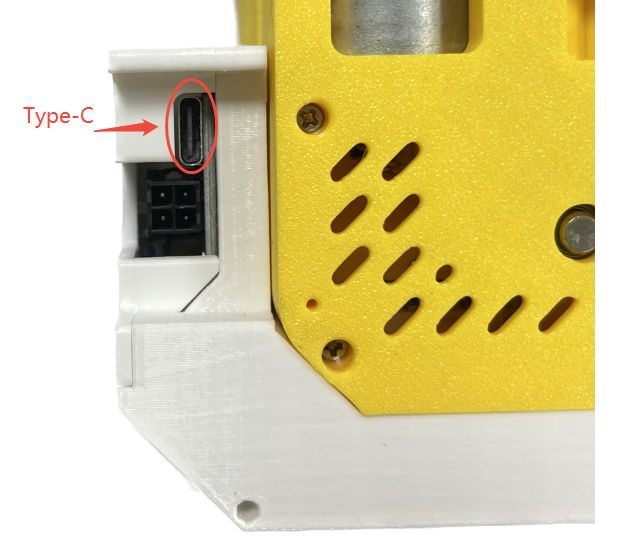
Prerequisites
- **Type-C:**USB to Type-C
- **Computer:**Windows PC recommended
- Software: BMCU Flasher - Download )
Flashing Steps
Step 1: Hardware Connection
⚠️ IMPORTANT: Ensure BMCU is NOT connected to the printer!
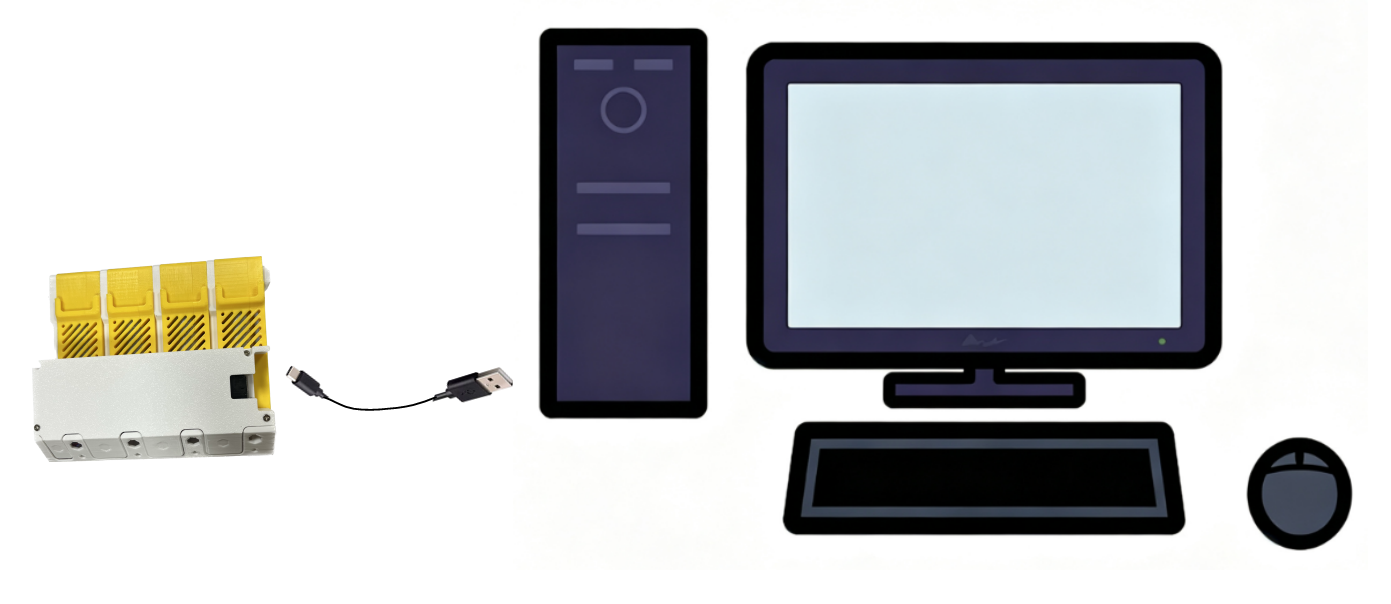
Connect the BMCU mainboard and Computer according to the following wiring:
Step 2: Install Driver
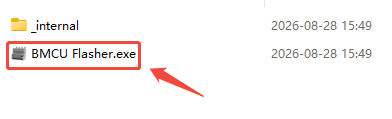
- Install the BMCU Flasher program and open it;
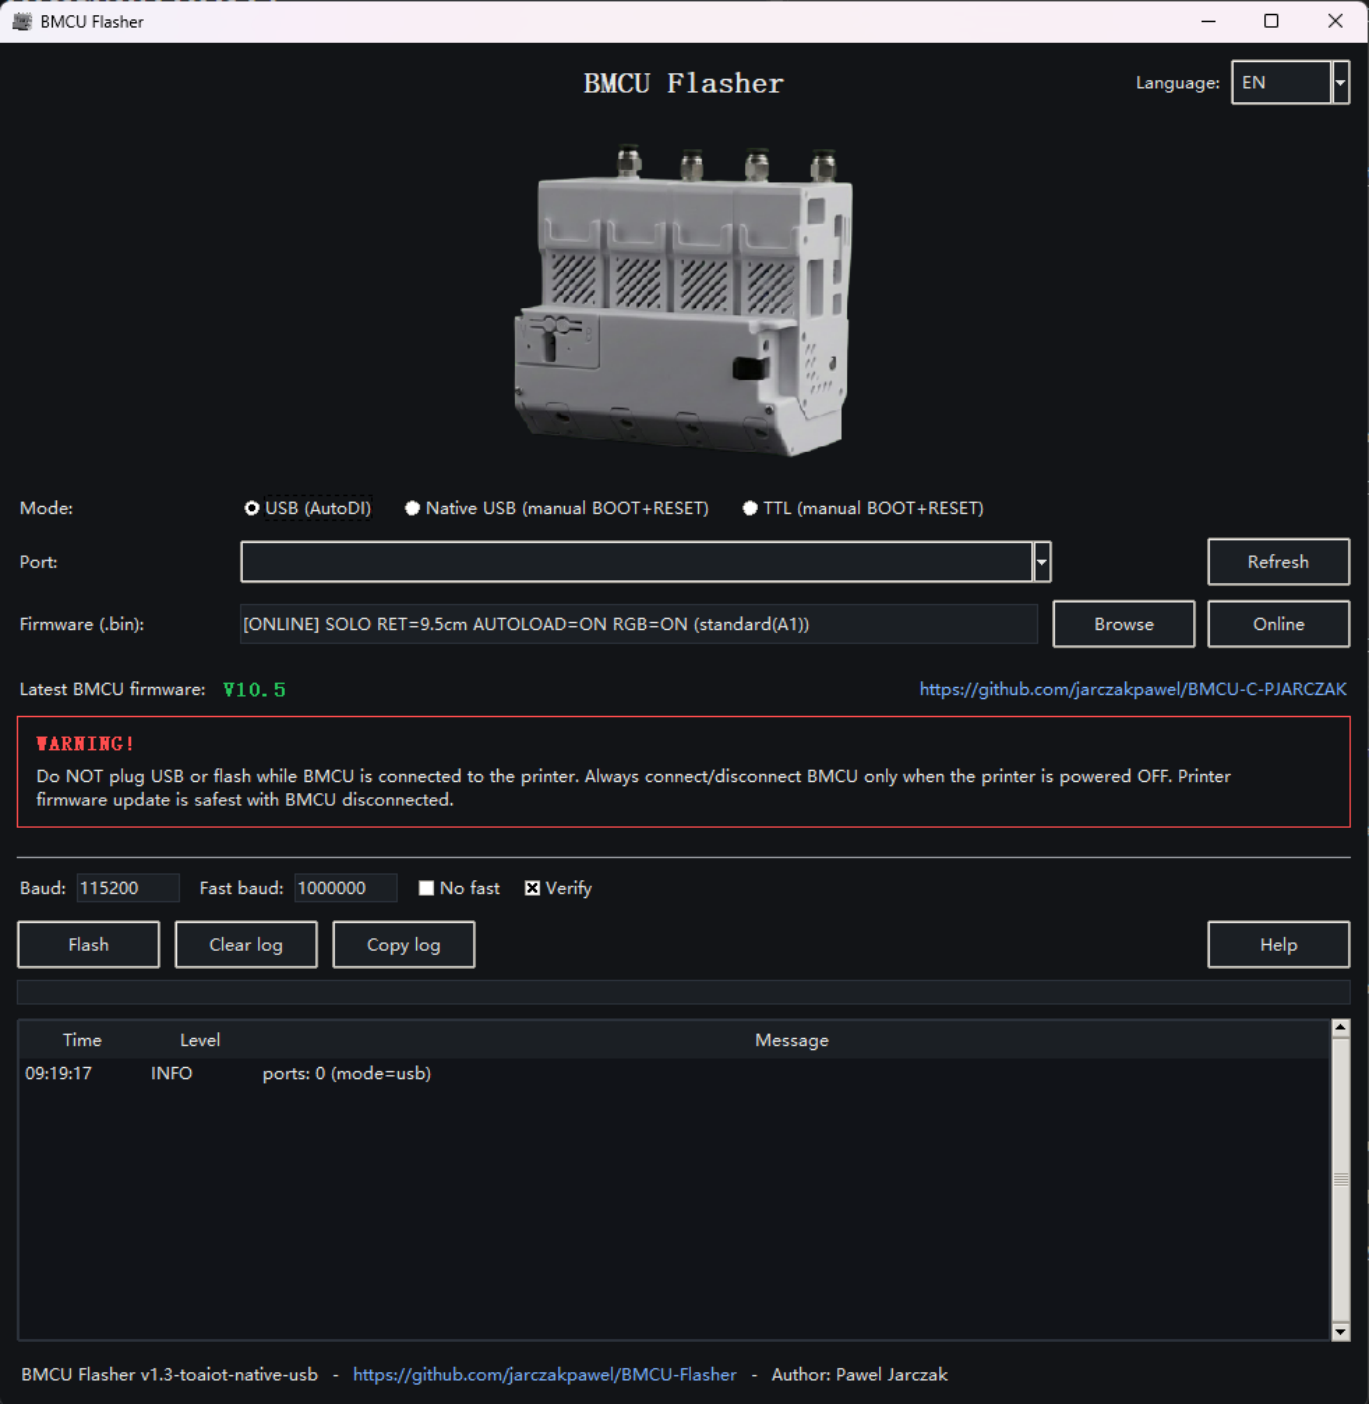
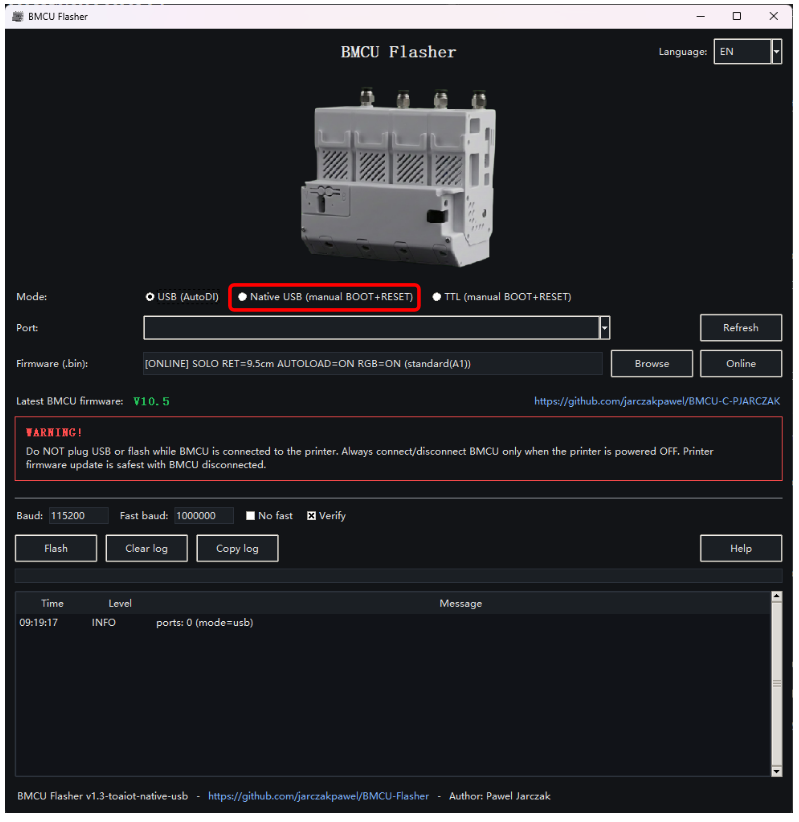
- Click ONative USB (manual BOOT+RESET), and the system should automatically detect the serial port;
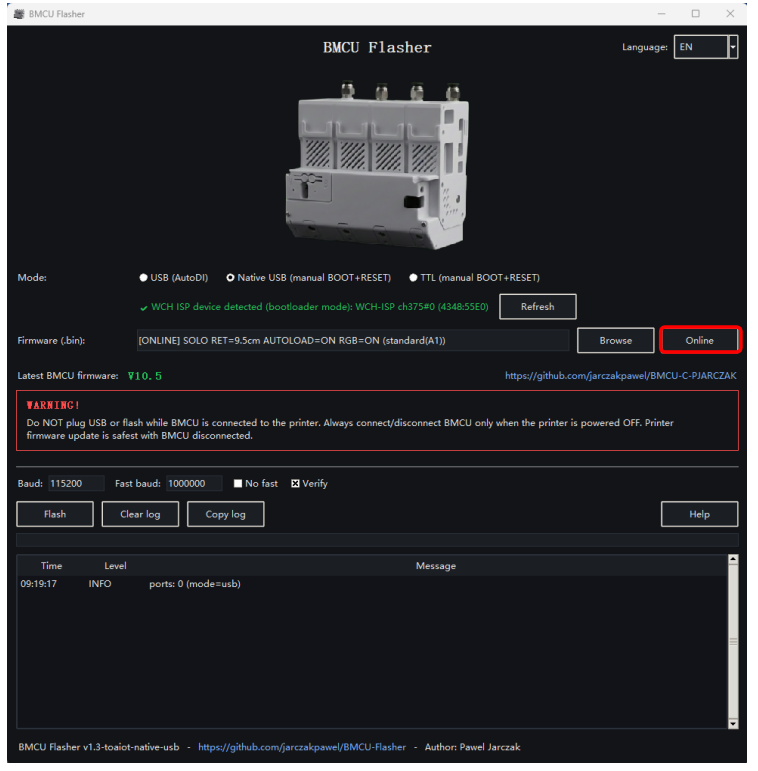
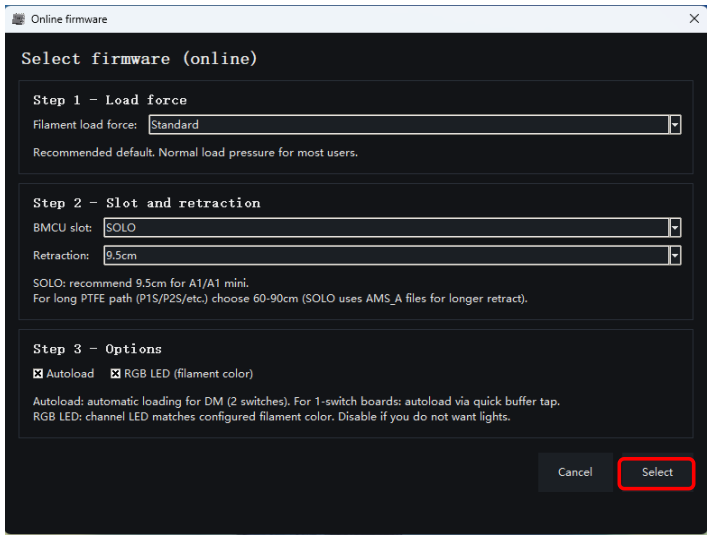
- Click Online, keep the default selection in the pop-up window, and then click Select;
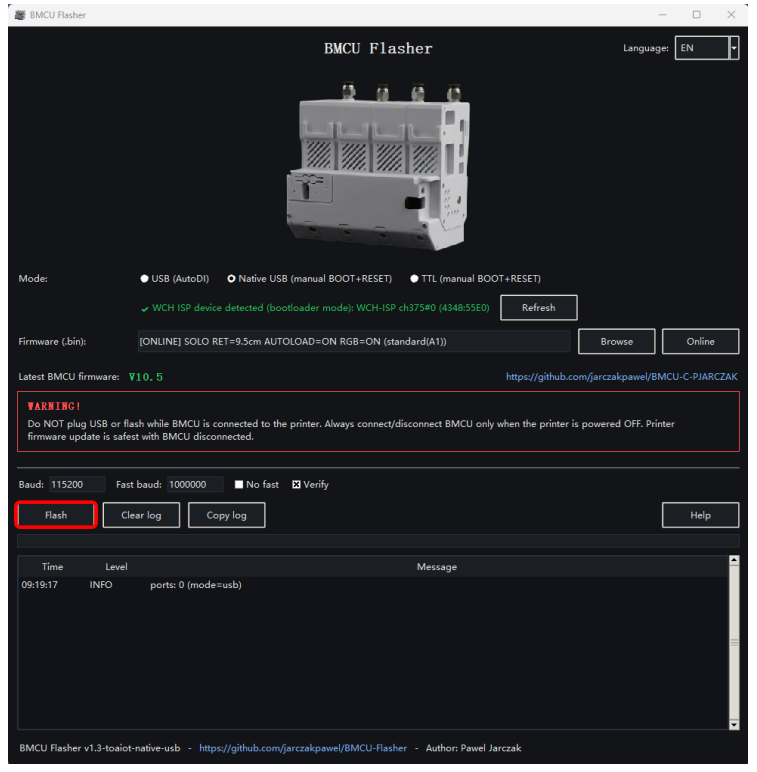
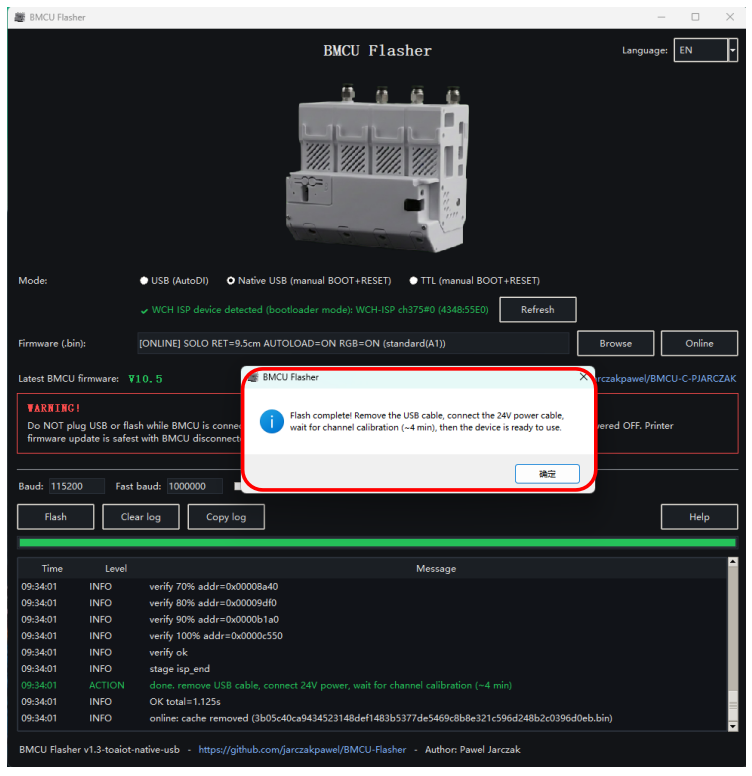
- Click Flash and wait for the flashing process to complete;
- Flashing complete
⚠️ After flashing, plug the BMCU into the printer; the BMCU will automatically perform a channel calibration that takes about 4 minutes ;
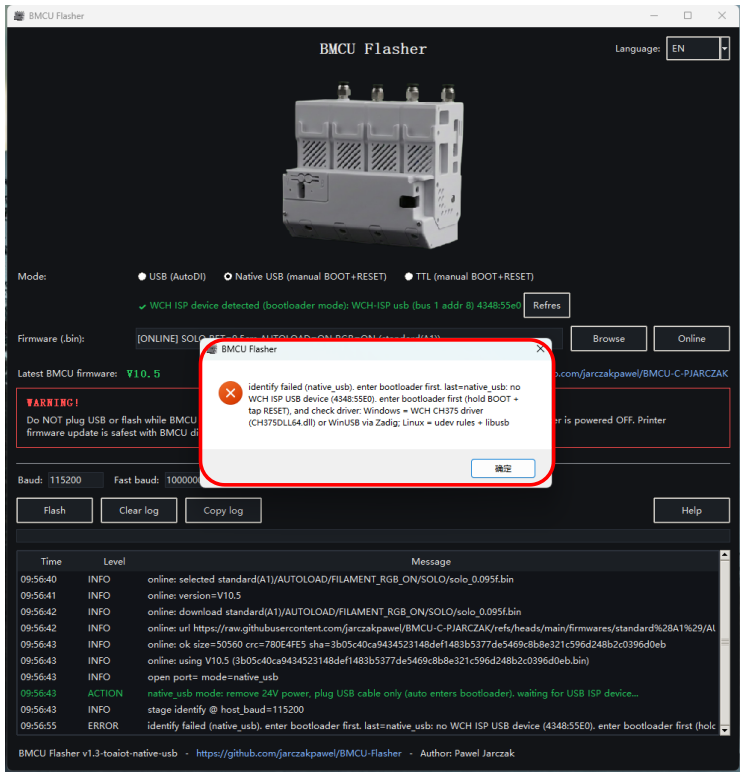
5.1 If the following message appears when clicking Flash: identify failed (native usb).enter bootloader first. last=native usb: no WCH ISP USB device (4348:55E0).enter bootloader first (hold BOOT + tap RESET), and check driver: windows = WCH CH375 driver (CH375DLL64.dll) or WinUsB via Zadig, Linux = udev rules + libusb;
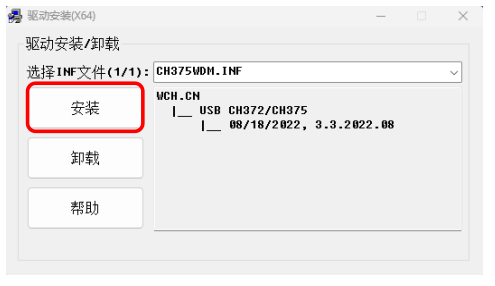
5.2 You need to install the TP-ISPTool driver - Download

5.3 Close the BMCU Flasher program and reopen it, unplug and replug the connection cable between the BMCU and the computer, then repeat the flashing steps above;
BMCU 370C V1.0
Warning
Prior to programming, ensure that.All solder joints are properly finished,No power supply short circuits exist
Important Notes Before Flashing
Version Compatibility
- Before October: Old version BMCU with dual buffering required different firmware versions; using with P series required flashing firmware
- After October: Upgraded dual-microswitch version can be directly plugged in and automatically recognized
However, the P series with external five-way control requires flashing firmware version 1.08
Prerequisites
Tools and Software Required
- Dupont wires - To connect the programmer and BMCU mainboard
- USB to UART adapter - Need to bring your own
- Computer - Windows PC recommended
- Software: WCHISPTool - Download
Flashing Steps
Step 1: Hardware Connection
⚠️ IMPORTANT: Ensure BMCU is NOT connected to the printer!
Connect the BMCU mainboard and USB-UART tool according to the following wiring:
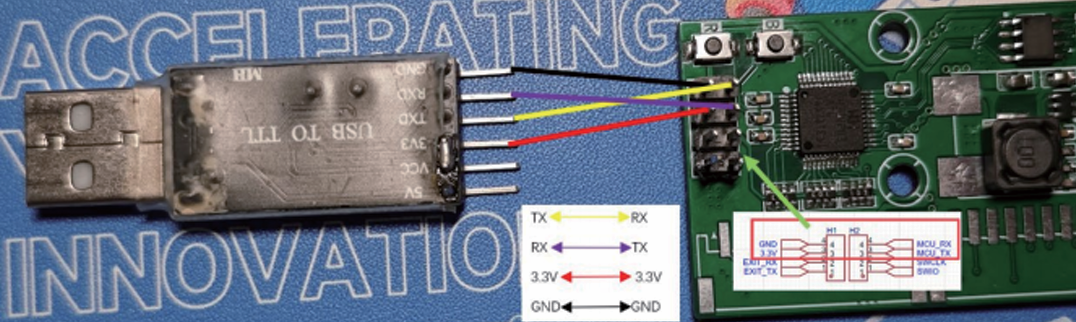
Step 2: Install Driver
- Connect the USB-to-UART tool to your computer
- The system should automatically detect the serial port
- Note your specific COM port number (may differ from examples)
- Use the actual port assigned to your device
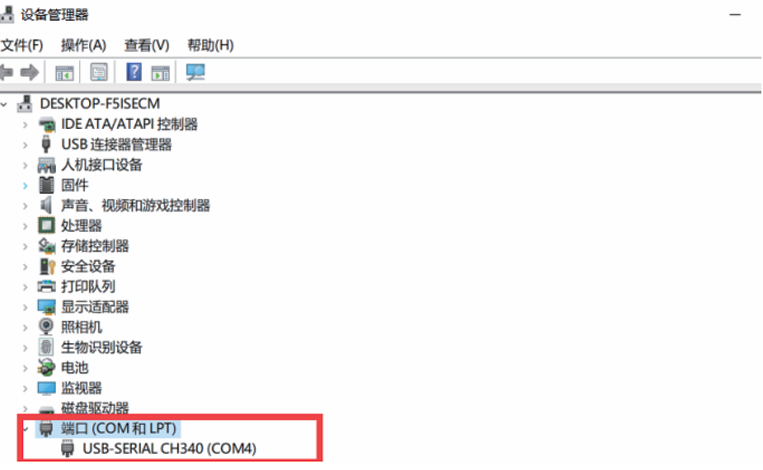
Step 3: Enter Programming Mode
- Press and hold the B button with your left hand (do not release)
- Press the R button once with your right hand and release
- Keep holding the B button (it's best not to release it)
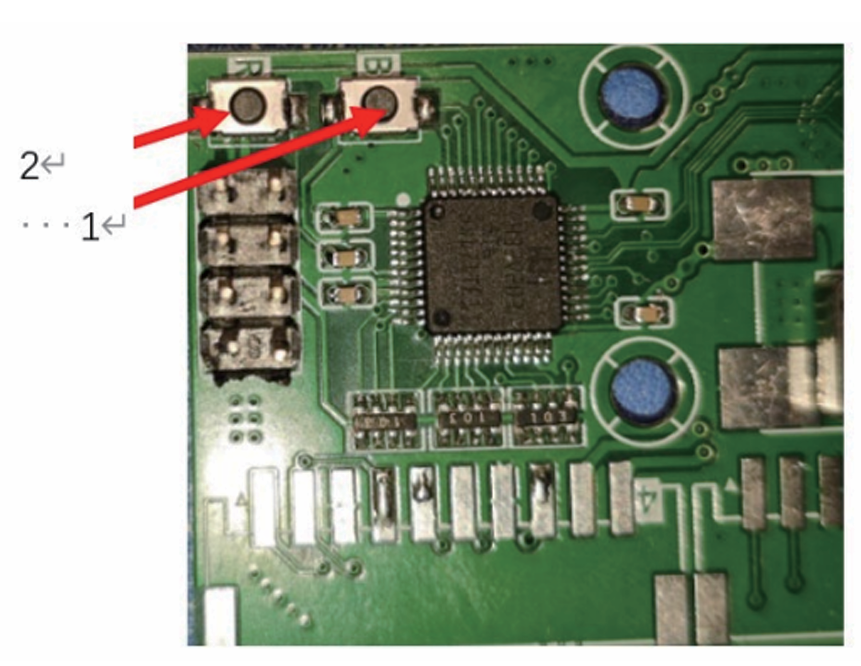
Step 4: Configure WCHISPTool
- Open WCHISPTool software
- select the corresponding MCU series, model,download method
- Check the download configuration
- Wait for the message: "(Read/write protection unlocked successfully!)"
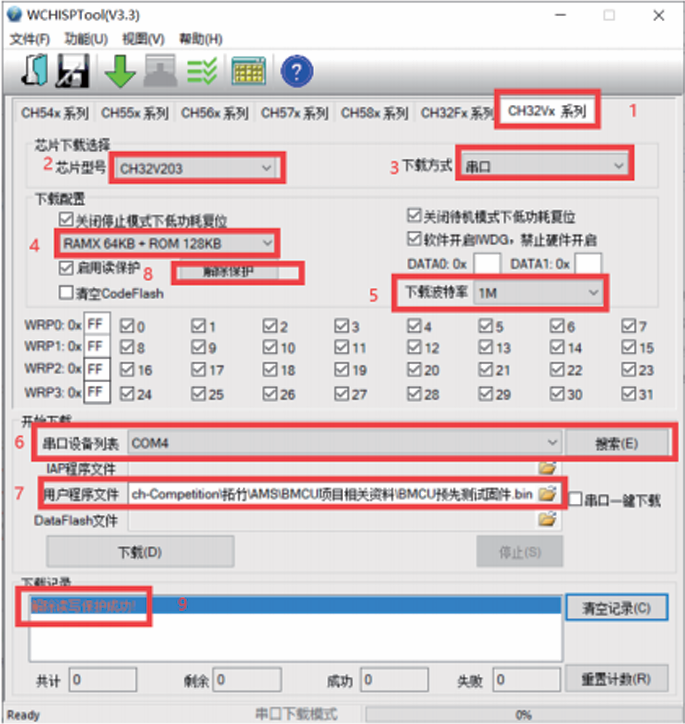
Step 5: Flash Firmware
- Click the "Download" button
- Wait patiently for the process to complete
If download fails:
- Try selecting baud rate of 115200
- Check Dupont wire connections
- Note: The "Contact Protection" button must be clicked for each download attempt
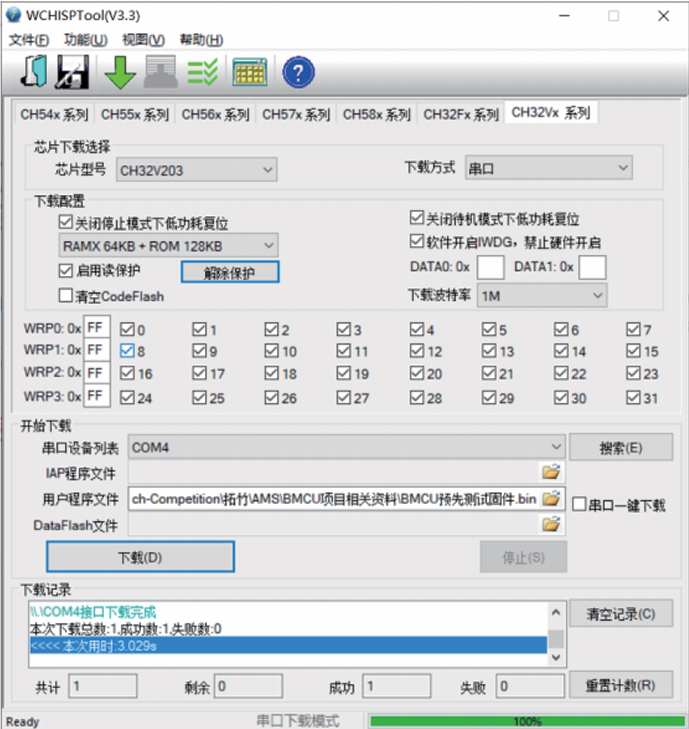
Step 6: Verify Success
- Press the R button at this point
- The red LED on the BMCU mainboard will illuminate
- This indicates successful program burning!